Antique Brass Shower Enclosure - London
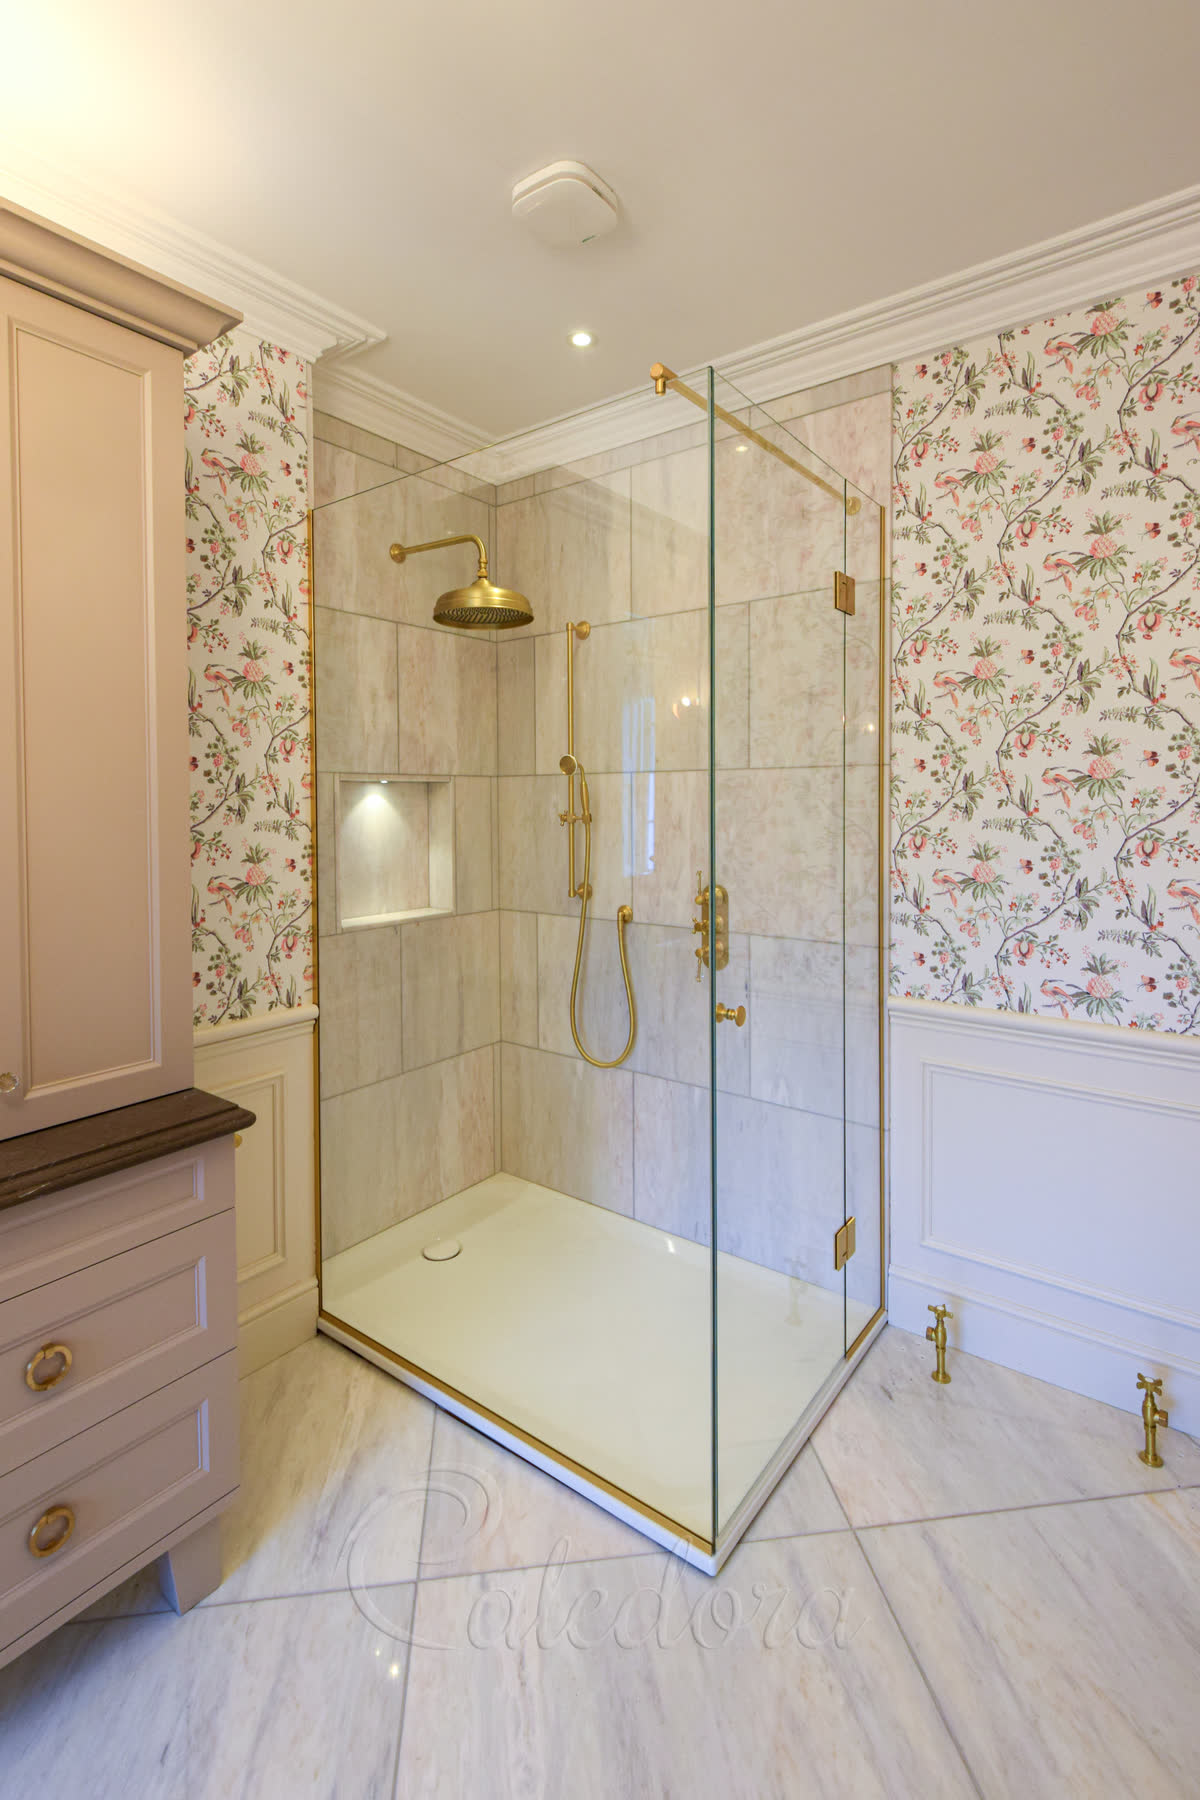
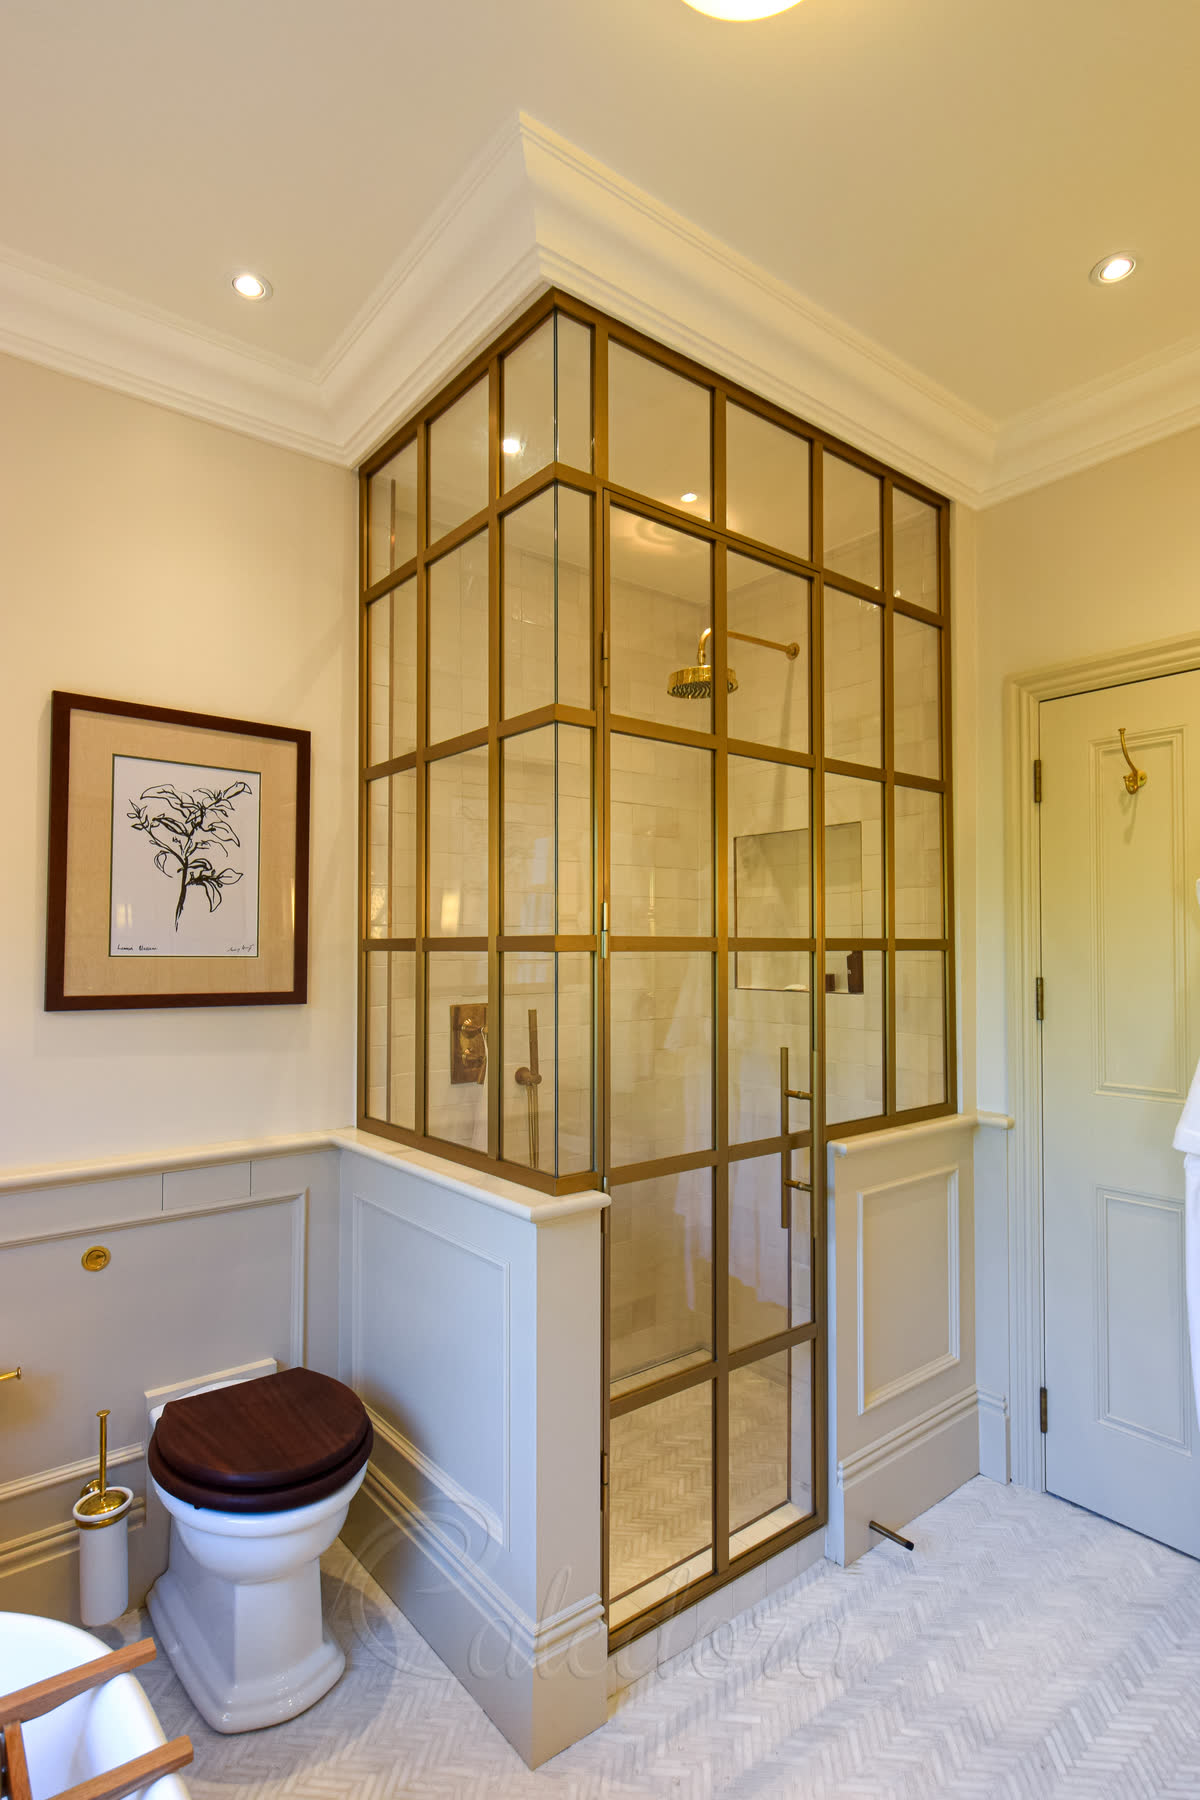
We put in this corner shower enclosure, which shows how antique brass hardware may work with a classic bathroom design. The warm brass finish complements the other bathroom fixtures, and the wall-recessed positioning creates clean lines that harmonise with the scaffolding board walls.

Spacious corner design with stone tray
This corner shower enclosure sits on a stone tray with an 80 mm upstand that we recessed the glass into. The antique brass hardware complements the warm wood boards and ornate chandelier perfectly. You can see how the scaffolding boards create texture against the clean subway tile inside the shower.
The stone tray was already in place when we arrived, and we sealed the glass into the tiled upstand using matching-colour mastic. The glass recessed in this way creates a watertight seal while maintaining a neat design. The three antique brass hinges support the heavy door, and the 45-degree reinforcement arm at the top provides stability.

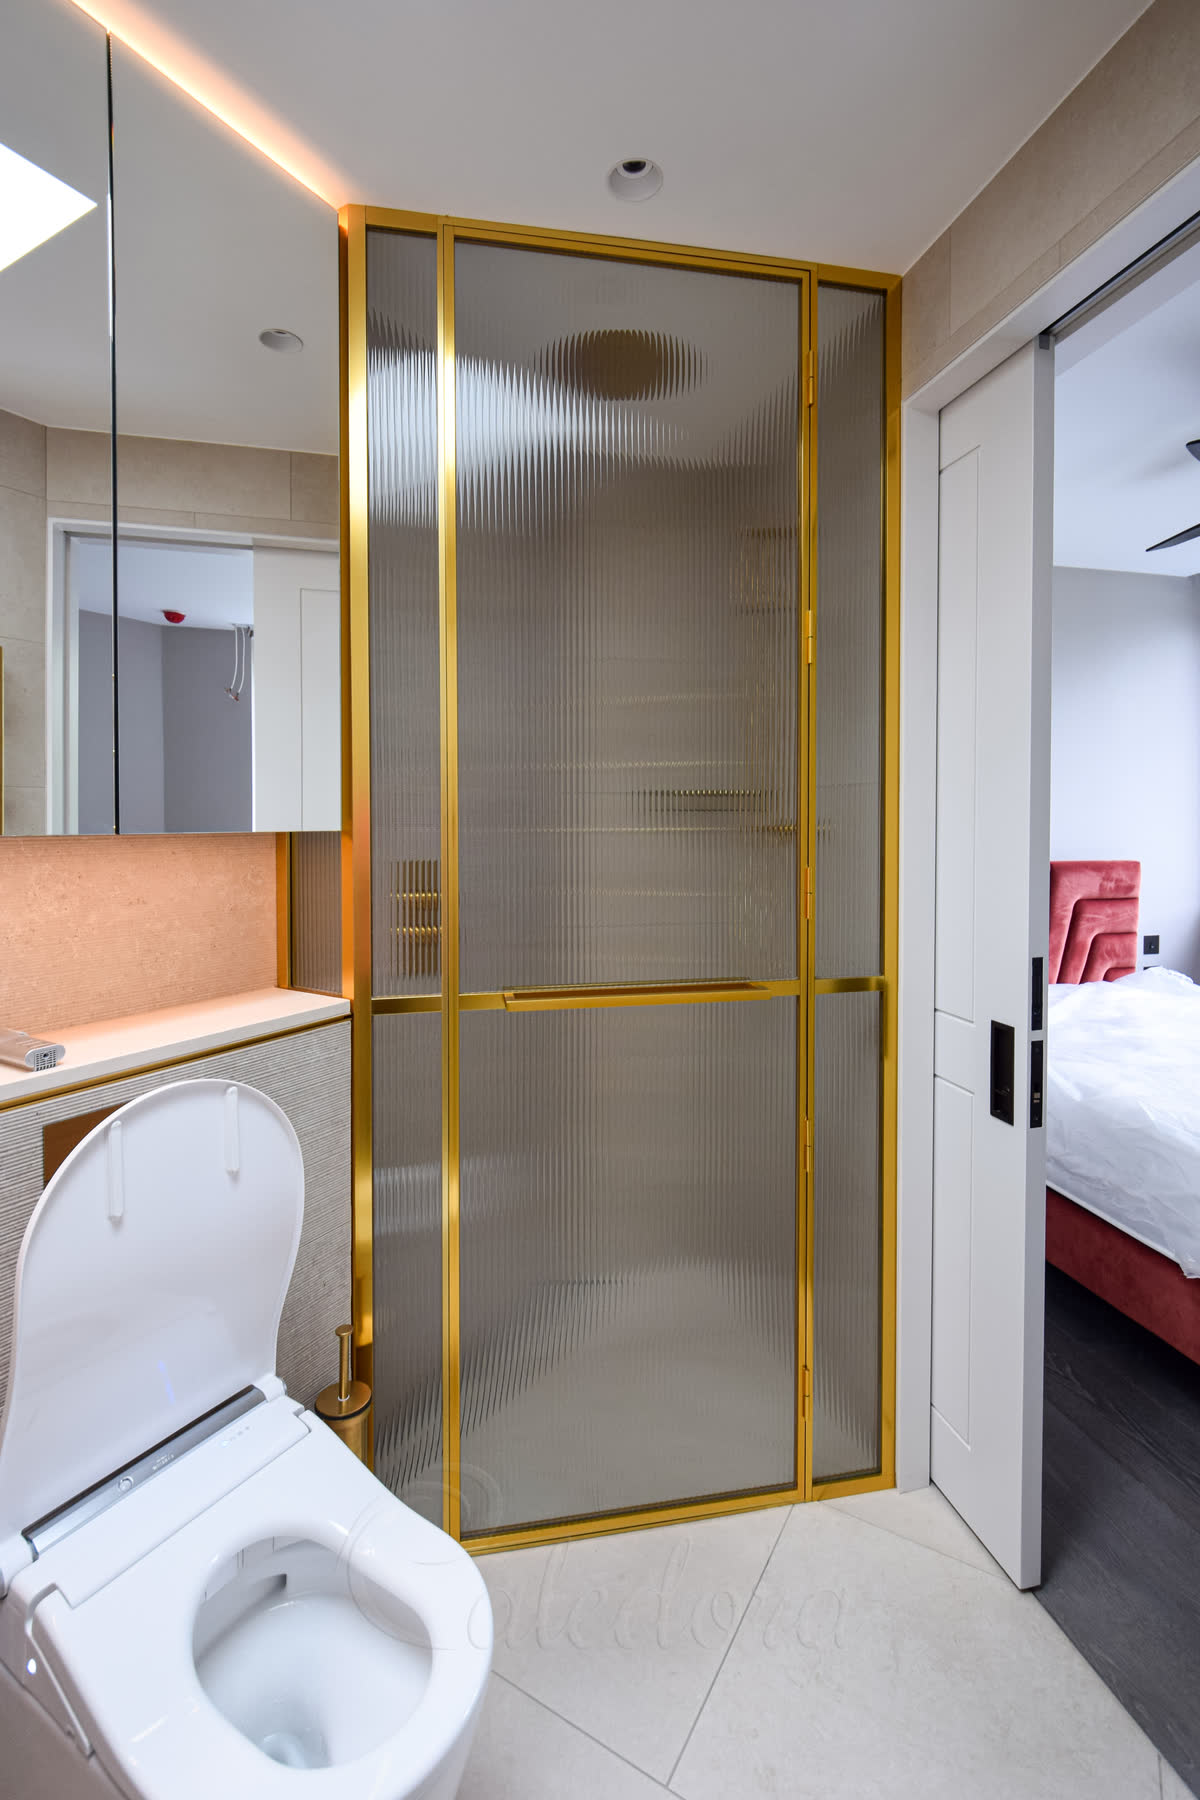
Wall recessed installation with antique brass hardware
We installed antique brass U-channels where the glass meets the walls, ensuring they remain flush with both the scaffolding boards and the tiles. The profiles are recessed into the walls, so they don't protrude, creating clean lines that follow the existing surfaces.
This wall-recessed approach means you don't see any bulky brackets or fixtures. The U-channels hold the glass securely while the matching antique brass finish ties everything together. We create installations that work perfectly with your existing bathroom design.

The door opens inward with a towel rail
The door opens inward and can swing 90 degrees in either direction, but most people use it as an opening to the outside. We installed a towel rail on the door because there's nowhere else nearby to hang a towel. When you open the door inward, the towel rail swings out, placing the towel directly in front of you.
This practical solution means you can place your towel before showering, and then it's perfectly positioned when you finish. The towel rail is made of antique brass, matching the other hardware in the bathroom. The door required three hinges instead of two because it's quite heavy, especially with the 10mm clear glass.

Heavy door needs extra support
Because this door uses 10 mm clear glass, it's quite heavy and needs extra support. We used three antique brass hinges instead of the usual two and added a 45-degree reinforcement arm at the top. This arm connects to the return panel, keeping everything stable as the door opens and closes.
The reinforcement arm is positioned at an angle to give the best support while staying out of the way. Like all the hardware, it's finished in antique brass to match the hinges and towel rail. This extra support ensures the door remains perfectly aligned for years of smooth operation.

The antique brass finish fits the design
The warm, antique brass finish goes perfectly with the style of this bathroom. The brass hardware complements the fancy chandelier above, making the design feel both classic and timeless. The walls, made of scaffolding boards, offer a texture that complements the metalwork in the vintage style.
This antique brass finish provides the shower enclosure with a premium look that complements high-end bathroom fixtures. The clear glass keeps the space feeling open. At the same time, the brass hardware provides the perfect accent against the natural wood and stone materials.
Product Specification
Style
Corner Shower Enclosure
Metal Finish
Antique Brass
Glass Type
10mm Clear Glass
Frame Style
Frameless
Special Features
Minimalistic Door Seals, Towel Rail, Wall Recessed
Price Range
£££
Frameless Corner Shower Enclosure Delivery Timeline
Frameless corner installations rely on precise glass-to-glass connections and minimal hardware. Your Frameless Corner Shower Enclosure timeline depends on measurement accuracy and wall preparation.
Is your bathroom tiled and ready?
Interested in a Similar Design?
Let our experts create a bespoke shower solution perfectly tailored to your space. From survey to installation, we handle everything with precision and care.
Similar Shower Room Ideas
Explore more shower room ideas with similar styles, finishes, and features. Find inspiration from our portfolio of completed installations that match your design preferences.

Understanding Our Pricing
Each symbol reflects a full-service estimate, including survey, design, production, and installation. We only offer complete packages — no supply-only options.
Prices are adjusted based on real projects and assume the installation is within one hour's travel from one of our offices. Travel beyond this range may increase the price.
VAT is not included and will be added where required. Displayed prices are for guidance only and reflect localised, complete installations.
Price Range Guide
- £Up to £1,500
- £££1,501 - £2,500
- ££££2,501 - £3,200
- £££££3,201 - £8,000
- ££££££8,001+